› Forums › Spectroscopy › First Spectroscope finished… (well, mechanically).
- This topic has 5 replies, 4 voices, and was last updated 6 years, 1 month ago by
 Tony Rodda.
-
AuthorPosts
-
16 February 2018 at 5:55 pm #573958
 Tony RoddaParticipant
Hi Guys,
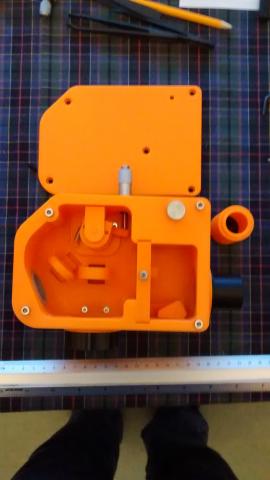
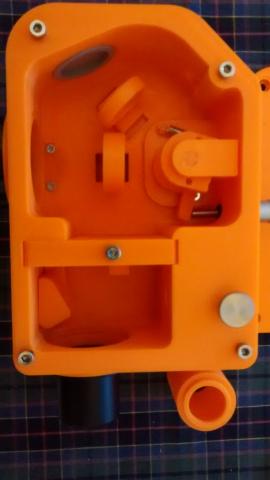
Greeting from 20 year old Angel land. Here’s a quick update for anyone interested in the Paul Gerlach DIY spectroscope..
First one finished in PLA (the second is being printed as I type and a new spool of black ABS has just arrived for what I hope will be the ‘final product’).
It’s mechanically sound and the component fits are very good. Tolerances from the design are superb and Paul has done an amazing job. I’ll be spraying (see below) and fitting the optics for V1 over the weekend.
I know orange is the worst colour for a spectroscope (apart from white) but I’ve sprayed a few test parts with dark grey acrylic primer and black matt acrylic (both automotive) which seems to ‘completely’ address the transparency issues. I’ll find out when I mount the optics. Actually orange has been great for hacking, sorry “modifying”, the components to fit different optics etc. You can see measurement/cutting marks easily. I’ll be experimenting with different optics and gratings from the ‘Ken Harrison magic box’ asap. (I’ve ordered a ‘proper’ optical bench to play with).
I printed using thick walls and high density infills so the PLA is quite machinable and is much stronger than I thought it would be. A Dremel/Draper does wonders by the way. As does a good set of needle files.
Despite the reasonable mechanics I’m adapting the second ‘print’ to have standard metal scope/camera adapters (drilled and grub screwed) to ensure good interface strength. In addition I’ve cut/drilled aluminium bars to brace the body ‘mecanno’ style. I’m hoping that will help mitigate the thermal expansion issues. Again, the proof of the pudding… I’ll tidy the final build.
That, by the way, is the way I think this kind of project will go until “wonder materials” are available for printing. A hybrid design of printed and metal parts to maximise each’s best attributes.
I’ve a calibration unit already on the bench for V2. Electronically similar to Alpy but bolted to the underside like the focus unit with bulbs placed inside the slit compartment. The ‘screen’ is manual push through and ‘flood everything inside the slit-holder compartment’. Only enough room to work for the Alpy slit. But I think it’ll work as a first pass to mess around with on a test bed. My (very) old electrical engineering days haven’t helped prevent a few small soldering iron burns :0( Things will improve.
So, onward. And remember, ‘you can’t tell a fool he’s wrong’. Now I’m learning 3D CAD as quick as I can and printing for all I’m worth.
A friend at Newcastle Astro talked about meteorites the other day and got talking about reflection spectroscopy. Anyone know what/where I can read up on that? And any designs?
As soon as I’ve bench/scope tested V1 I’ll update if anyone’s interested.
 17 February 2018 at 12:34 pm #579129
 Andy WilsonKeymaster
Hi Tony,
That is a nice looking spectrograph, and at least being orange you are less likely to bump your head on it in the dark. It sounds like things are progressing well and I’ll be interested to see the results once it is operational.
Best wishes,
Andy
18 February 2018 at 11:25 pm #579138 Nick JamesParticipant
Very impressive. 3D printing (or ALM as we should call it now) really is quite a mature technology. What printer are you using?
19 February 2018 at 10:04 am #579141 Paul LuckasParticipant
Hi Tony,
Great work. How long did it take to print the main body at high infill? Was your printer screaming for mercy? 🙂
Paul
21 February 2018 at 7:21 pm #579165Tony RoddaParticipantNick, A Wanhao i3Plus, and yes, it’s a fantastic new manufacturing ‘additive’ process. I’m sure as new materials are added by suppliers then everyone will embrace the concept. I chose the Rhino because its very well made and a mature product with good support and a good sized community. Probably not the biggest print bed on the market but very easy to use.
Paul, the whole thing took a week – but that was mainly due to other things such as wife, kids, life needing attention. They were the ones screaming for mercy!!! Probably three full days but nothing compared to the time i’d need to acquire, learn, perform lathe/metal work skills!
Yes, high infill levels and ‘thick’ walls. A small price to pay for the rigidity and the extra benefit of being able to drill, file, sand, tap, etc. See below.
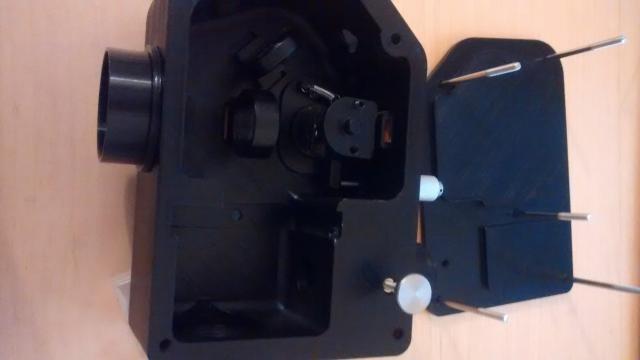
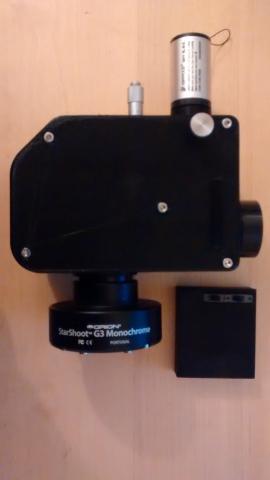
Version 1 finished, fitted and optics, as per PG’s configuration, ready to assemble tomorrow. SimSpec seems to suggest a resolution of above 2,300 for the config below. (If I’m inputting/reading SimSpec correctly). Tee only ‘upgrades’ being metal interfaces.
Version 2, in ABS, printing now and almost complete with all the optics,etc assembled for several more configs to stretch the design. I know I’m running before walking but its fun. The higher gratings, larger lenses etc within the same physical config (body machined to accept greater grating rotation, etc) when input to SimSpec suggest resolution from 5,000 all the way up to 9,000+ but that requires an almost fixed config. Lots of drawbacks but I just want to see what happens. Beamsplitters instead of guiding mirrors, etc.
I can test transparency, thermal expansion and general stability along with mechanics for the two materials.
And I have a working calibration unit for Neon needs mounting. I have a strong suspicion that I’ll be able to fit tungsten and Relco bulbs too. The parts bin gets bigger but a least I can print more parts bins…
 13 March 2018 at 8:58 pm #579224Tony RoddaParticipant
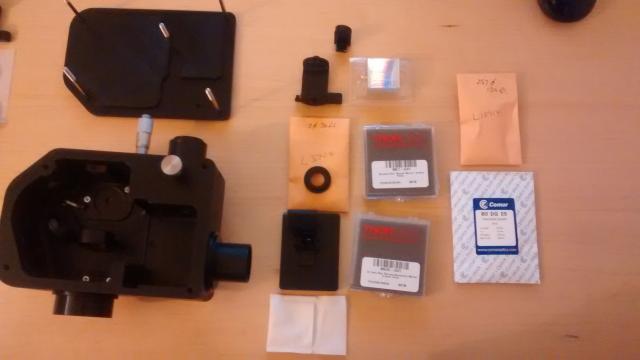
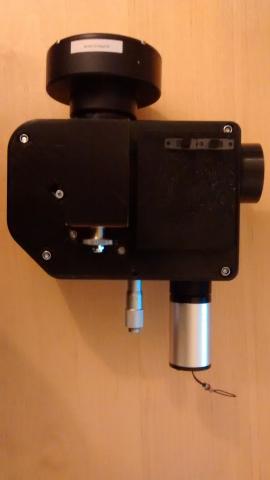
All the holders, etc printed (in PETG-Carbon) for the ‘over-sized’ 600 l/mm grating, collimation lens and Camera lens. Additional grating holders for other l/mm too. PETG with carbon is an excellent material but a b***er to print with, but getting there. still experimenting with printer settings.
‘Calibration’ circuitry complete and running for Neon and Relco. The latter after adding a diode voltage amp phase to the existing voltage multiplication chain, blowing a few components and swearing a great deal. It’s a good thing the Chinese sell 50 components for tuppence. This is now “miniaturized” and boxed (See photos) although not fully fitted – a few print/design issues to work through properly. (Its miniature by virtue of the fact my initial attempt was three times larger than it needed to be). I’ve added a manual ‘screen’ that can be inserted in front of the slit to reflect calibration bulbs. Works but not completely sorted – on the right lines. (This only works for the ‘ALPY’ slit. Not enough room in the ‘guiding chamber’ when the OVIO holder is fitted).
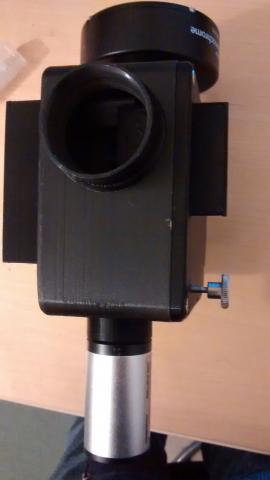
A couple of cameras rigged purely for initial alignment but showing nice sharp emission lines across the spectrum. Lots of messing about with lens positions of course and (back) focus is tight. I’ve drilled and inserted grub screws into the camera interfaces for security.
I’ve been ignoring the real observing ‘work’ and am taking a break to catch up but I plan to put the basic LowSpec on the ‘scope the next chance I get.
Regards
-
AuthorPosts
- You must be logged in to reply to this topic.